Showing posts sorted by relevance for query Building to the Weather. Sort by date Show all posts

Sunday, June 1, 2008

Building to the weather - Part 5 of 7: What goes where, a no-tech solution

All over the world people have learned over the centuries how to work with their specific conditions - their macro- and micro- climates. This is the technical definition of 'original green'. I have used the past several posts to detail the design of the Park-McCullough carriage house, to illustrate how the architect worked with the southern Vermont climate, while also creating a visual masterpiece.

This post focuses on the layout of the spaces inside the barn, how they plan works with the weather. Here's the floor plan: South is to the top, north on the bottom, the horse stalls to the west (right side), the front door to the east (left side). The general purpose room is where a horse would have been harnessed to a carriage, while the small bay to the south (top) was for carriages, maybe those needing maintenance. Note than no door opens to the north or west - only toward the mild east or the sunny south. There is a logical, efficient progression of spaces from the horse stalls to the carriages and on to the front door, with stops along the way for harnessing and tack, additions on the sides for staff quarters and repair, and space overhead for hay and grain.

This building is also designed to maximize the comfort of its occupants all year round - without technology. The long working side of the barn faces south - the previously mentioned spaces for the carriages to be readied for use, as well as the tack room holding leather bridles, saddles, horse paraphernalia. Next comes the store room for harness, and the grooming room with double doors facing south, and then the stable. On the other side of the building, the north side of the main carriage space (holding carriage not in use) can be closed off in winter by 20' long sliding doors. There is a 'people' door (3 ft. wide) between the hall and the north bay bearing Trenor Park's monogram, which speaks to this north side's regular separation from the main bay.

Continuing around the building, the horse stalls on the west end need only small windows set high in the wall, literally 'horse windows' just the right size and height for horses to look out of. Thus, with only a few small openings, the stable also becomes a barrier to the cold west wind in winter, helped in part because the horses' own heat will keep the stable warm, making it a buffer for the main barn.

The two chimneys in the barn serve the rooms designed for people; the grooms' quarters on the north side, and the tack room, on the south. The tack room - a work room - is buffered from the elements by being set in the middle of the building, almost entirely surrounded by the carriage and store rooms. It has a large window for natural light, and the warmth of the winter sun . Even its exterior walls are set in a sun pocket, where they are protected by south and east facing walls. With a coal stove, this room would have been a cozy place to mend tack and talk about horses. The wash room is protected by its location too. It is in the center of the carriage house, beside the tack room, under the hay loft. The water used to wash the carriages drained down the sloped tin floor into the cellar. That water would not have been quite so cold here in the winter, in a room buffered on all sides. Above it all is the hay loft, filled with fabulously good insulation (hay!), which disappears in the summer when it is not needed, and reappears each fall.

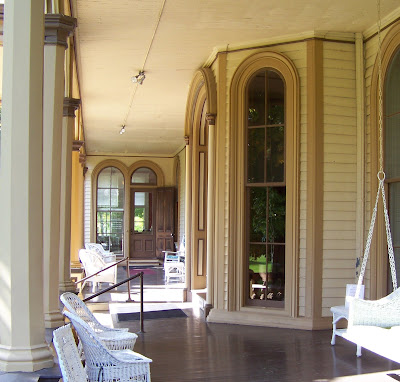
Lastly, there are those large carriage house windows, which let in the welcome winter sun shine, and can be opened across from each other in good weather, encouraging breezes. And so we come full circle to my post about the cupola, and how it acts as original air-conditioning.


Here is the whole series:

Part 1 - http://www.jgrarchitect.com/2008/04/building-to-weather.html

Part 2 - How does the carriage house work with the sun to minimize wind chill?
              http://www.jgrarchitect.com/2008/04/building-to-weather-2.html

Part 3 - Why bother with a cupola?
             http://www.jgrarchitect.com/2008/05/thats-pretty-amazing-cupola-with-all.html

Part 4 - Eaves? they're important?
             http://www.jgrarchitect.com/2008/05/eaves-for-work-and-play.html

Part 5 - How a floor plan makes a difference:
             http://www.jgrarchitect.com/2008/06/no-tech-warmth-with-low-tech-aid.html

Part 6 -  A look at how these concepts were used at the Big House:
             http://www.jgrarchitect.com/2008/09/big-house-is-green-too.html

Part 7 - Shutters:            
             http://www.jgrarchitect.com/2008/03/shutters-ok-i-know-that-they-were-for.ht


Thursday, May 22, 2008

Building to the Weather - Part 4 of 7: Eaves, at work and play

Eaves do very important work.
From a practical perspective, they help to keep the rain water that drips off of a building's roof away from its walls. Water on the walls will become trapped water inside the walls, which quickly leads to mildew, mold, and rot. Similarly, eaves keep icicles from forming directly on a building's outer walls (an icicle on the wall can become an icicle dripping down the wall, leading again to water inside the wall).


Eaves that stick out 6" are just barely deep enough to keep rain off; a 9"-12" overhang is better. The Carriage House eaves shown here are 18" deep. Copper gutters - now worn out and removed - originally sat in the curved brackets running along the edge, adding 4" more depth as well as redirecting the water.

Eaves are also for play, of course - they make the carriage house fun to look at. And without eaves, this building would just be an awkward box with bumps. The length of the eaves, their edge moldings, and the rows of brackets underneath all come together to create a roof that visually shelters what's inside and delights the eye. The corbels facing both ways at the ends of the dormer windows and the at the barn's cornerssee the first photo) are just frosting on the cake.

The eaves here have another job - quite visible in the second picture. This is the south view of the western end of the barn - the eaves keep the summer sun from shining in the windows. This photograph was taken in early May, when the shadow line of the eaves is below the small windows in the stable - the sun will not shine in these windows again until late August. With the extra 4"of gutter, the windows would be shaded earlier and later in the year. Because the sun's path across the sky changes with the seasons (due to the Earth's tilt and rotation around the sun), in winter the sun will be low enough in the sky to shine below the eaves, and into those windows, bringing light and heat to the space inside.

That's a lot of creative 'green' stuff for an ordinary building detail to do. 


Here is the whole series:

Part 1 - http://www.jgrarchitect.com/2008/04/building-to-weather.html

Part 2 - How does the carriage house work with the sun to minimize wind chill?
              http://www.jgrarchitect.com/2008/04/building-to-weather-2.html

Part 3 - Why bother with a cupola?
             http://www.jgrarchitect.com/2008/05/thats-pretty-amazing-cupola-with-all.html

Part 4 - Eaves? they're important?
             http://www.jgrarchitect.com/2008/05/eaves-for-work-and-play.html

Part 5 - How a floor plan makes a difference:
             http://www.jgrarchitect.com/2008/06/no-tech-warmth-with-low-tech-aid.html

Part 6 -  A look at how these concepts were used at the Big House:
             http://www.jgrarchitect.com/2008/09/big-house-is-green-too.html

Part 7 - Shutters:            

             http://www.jgrarchitect.com/2008/03/shutters-ok-i-know-that-they-were-for.ht


Read Building to the Weather - Part 3.

Read 

Tuesday, September 23, 2008

Building to the weather - Part 6 of 7: The Big House is 'green' too

In a previous post, I described how the Park-McCullough's Carriage Barn uses 'original green' design to work with the climate. This post is about how the main house uses the same green techniques.

The Big House, as the family called their summer home, has porches designed to shield the first floor from the strong summer sunshine. Large windows - 7 ft tall by 3 ft wide - are set across from each other, making cross ventilation easy. The Observatory acts as a vent at the top of the House, just the cupola does on the Barn.


This photo shows how the deep porch keeps the main floor in the shade, while the master bedroom on the second floor front corner gets morning sun.


Shutters from bedrooms into the upstairs hall allow air flow across sleeping rooms and up though observatory - creating a summer breeze while preserving privacy. Screening for windows had not been invented when the Big House was built. 


The Observatory: its vents work as do those in a cupola. It is also a wonderful place to look out over the countryside.


The 2 main entrances are to the south and east. The south entry is a weather entry (meaning two sets of doors that act like an air lock), and both are out of the wind.


The southern entry is at the center of the photo, with the tall window allowing light into the weather entry. In the 1890's the family added a breakfast room (visible at the end of the porch), which is sunny all day long.


Like the tack room at the Barn, there are rooms designed to be warm and bright. On the first floor the library (which became Lizzy Park McCullough's morning room) is a small room, easily heated, surrounded on three sides by the House. Similarly Laura Hall Park (Lizzy's mother) had her own room on the second floor. A beautiful room with a room-wide, floor-length bay window facing south, snugly set in the middle of the house, it has it's own fireplace. Laura did beautiful embroidery - she left some for us to admire. It is easy to imagine her sewing by the window.

The south facing bay window floods Laura Hall Park's second floor morning room with light. A morning room was a Victorian lady's personal, informal space, an antidote to the formal entertaining rooms on the first floor.


The layout of the House brings light and sunshine into the family space on the second floor. The main bedrooms are on the east and south sides of the House, the swing rooms to the north.
The House boasted a 'modern' central heating system when it was built in 1864, but all the rooms still had coal fireplaces (some were later reworked to be wood burning). All the rooms could be closed in with doors, shutters, and heavy floor length drapes.


A typical bedroom fireplace with a coal insert.


The open second floor sitting room dates from the 1890's renovation, after the central heating system was upgraded.

Here is the whole series:

Part 1 - http://www.jgrarchitect.com/2008/04/building-to-weather.html

Part 2 - How does the carriage house work with the sun to minimize wind chill?
              http://www.jgrarchitect.com/2008/04/building-to-weather-2.html

Part 3 - Why bother with a cupola?
             http://www.jgrarchitect.com/2008/05/thats-pretty-amazing-cupola-with-all.html

Part 4 - Eaves? they're important?
             http://www.jgrarchitect.com/2008/05/eaves-for-work-and-play.html

Part 5 - How a floor plan makes a difference:
             http://www.jgrarchitect.com/2008/06/no-tech-warmth-with-low-tech-aid.html

Part 6 -  A look at how these concepts were used at the Big House:
             http://www.jgrarchitect.com/2008/09/big-house-is-green-too.html

Part 7 - Shutters:            
             http://www.jgrarchitect.com/2008/03/shutters-ok-i-know-that-they-were-for.ht


Wednesday, June 25, 2008

Building to the weather - what is Original Green?

"Original Green, passive solar, building to the weather."

These are all ways to describe the same thing - how people all over the world have traditionally built to work with their specific climate.

People who look at architecture often see buildings as aesthetic symbols, or evidence of a society's aspirations. Sometimes they see buildings in terms of structure and technology. Often they focus on monuments, places intended for ceremony. Europe's Gothic cathedrals are excellent examples of all those ideas. But buildings are foremost shelter, a place to be inside - protected from the weather, whatever it may be - spaces for living. Even cathedrals had spaces where people lived - cloisters - and often served as informal gathering places.

But our ancestors spent much of their lives outside. They lived without electricity, central heat or air conditioning, so they had to understand their surroundings. They learned how to adapt their buildings to their weather, making their daily lives more comfortable by how they fashioned those buildings. And they did this with no modern technology. Instead, they understood the basic forces: sun, rain, wind - the macro-climate - and their building sites, where topography and geography create specific micro-climates. Their solutions are wonderful, inventive, brilliant. So what I'm saying, is, " Hey, pay attention! This is great stuff! It's all around us, in its marvelous variety. Maybe you are lucky enough to already live in it!"

Read my  7 part series about 'building to the weather' at the Park-McCullough Barn and House


Part 1 - http://www.jgrarchitect.com/2008/04/building-to-weather.html

Part 2 - How does the carriage house work with the sun to minimize wind chill?
              http://www.jgrarchitect.com/2008/04/building-to-weather-2.html

Part 3 - Why bother with a cupola?
             http://www.jgrarchitect.com/2008/05/thats-pretty-amazing-cupola-with-all.html

Part 4 - Eaves? they're important?
             http://www.jgrarchitect.com/2008/05/eaves-for-work-and-play.html

Part 5 - How a floor plan makes a difference:
             http://www.jgrarchitect.com/2008/06/no-tech-warmth-with-low-tech-aid.html

Part 6 -  A look at how these concepts were used at the Big House:
             http://www.jgrarchitect.com/2008/09/big-house-is-green-too.html

Part 7 - Shutters:          
             http://www.jgrarchitect.com/2008/03/shutters-ok-i-know-that-they-were-for.ht

Monday, April 28, 2008

Building to the weather - Part 1 of 7: Maximizing sun exposure

What does it mean to 'build to the weather'?

Look at this 1864 barn, the Park-McCullough House Carriage House, designed by an architect for a very wealthy family. A working stable - people and horses lived in it year round. It had very little heat: a stove in the tack room, another in the living quarters. However, its use of natural forces for winter warmth and summer cooling were quite effective. The techniques can be seen in many other barns built for ordinary farmers.

There was plenty of land - the barn could have been sited and organized in many different ways. Architecturally, it was placed visually to compliment the House, sitting just beyond it and framing the lawn. The main facade looked back to the House (and the flower garden and pond, which are no longer there). add another photograph of the House and barn together

The architect considered the climate. He understood how to work with the sun. He set the long side of the barn to face due south for maximum sunshine - technically called 'solar gain'. The east end, the front, would get morning sun; the south side, sun all day; the west side, afternoon sun; and the north side, a brief bit of sun only in mid-summer. He knew that in this part of western Vermont the wind blows mainly from the west, sometimes from the north. Wind is good for cooling in the summer, but makes things colder in the winter - technically called 'wind chill'.

Here's the whole series:

Part 1 - http://www.jgrarchitect.com/2008/04/building-to-weather.html

Part 2 - How does the carriage house work with the sun to minimize wind chill?
              http://www.jgrarchitect.com/2008/04/building-to-weather-2.html

Part 3 - Why bother with a cupola?
             http://www.jgrarchitect.com/2008/05/thats-pretty-amazing-cupola-with-all.html

Part 4 - Eaves? they're important?
             http://www.jgrarchitect.com/2008/05/eaves-for-work-and-play.html

Part 5 - How a floor plan makes a difference:
             http://www.jgrarchitect.com/2008/06/no-tech-warmth-with-low-tech-aid.html

Part 6 -  A look at how these concepts were used at the Big House:
             http://www.jgrarchitect.com/2008/09/big-house-is-green-too.html

Part 7 - Shutters:            
             http://www.jgrarchitect.com/2008/03/shutters-ok-i-know-that-they-were-for.ht


Sunday, May 11, 2008

Building to the weather - Part 3 of 7: Original AC, or how to keep your barn from burning up, and your horses cool


 What a great architectural flourish at the top of the Park-McCullough carriage barn! An amazing cupola - with all its roof angles and arched vents.

It's also an important part of the cooling system. A vent at the top of a hay barn is essential: stored hay gets hot - hot enough to burst into flame. The vents let that heat escape out into the air.
They also help to keep the barn cool for people. Heat rises, so if there is an opening at the top of a building warm air trapped inside will escape. As that warm air goes out, replacement air has to come in from someplace else. If there is an opening - a door or window - lower down in the building, new, cooler air will flow in. If the vent at the top is smaller than the opening below, the amount of air coming in is greater than the amount that can easily go out. And more air wants to come in behind it! The air going out has to rush making a breeze.

In the summer, when the windows are open and the doors to the hay loft are open, a breeze will keep the carriage house, the workmen, and the horses cool.


Here is the whole series:

Part 1 - http://www.jgrarchitect.com/2008/04/building-to-weather.html

Part 2 - How does the carriage house work with the sun to minimize wind chill?
              http://www.jgrarchitect.com/2008/04/building-to-weather-2.html

Part 3 - Why bother with a cupola?
             http://www.jgrarchitect.com/2008/05/thats-pretty-amazing-cupola-with-all.html

Part 4 - Eaves? they're important?
             http://www.jgrarchitect.com/2008/05/eaves-for-work-and-play.html

Part 5 - How a floor plan makes a difference:
             http://www.jgrarchitect.com/2008/06/no-tech-warmth-with-low-tech-aid.html

Part 6 -  A look at how these concepts were used at the Big House:
             http://www.jgrarchitect.com/2008/09/big-house-is-green-too.html

Part 7 - Shutters:            
             http://www.jgrarchitect.com/2008/03/shutters-ok-i-know-that-they-were-for.ht


Tuesday, March 18, 2008

Building to the weather:Part 7 of 7 - Whys and Wherefores of Shutters

OK, I know that they were for protection - you closed up the house when you went away, or against a coming storm. Or they kept out the cold - 'Indian shutters', which came about after the Revolution, were not to protect against Indians, but for warmth in winter, 'coolth' in the summer, and for visual privacy from the street. And I know that our ancestors closed in their houses because they considered 'night air' dangerous.

I also know that 1) most houses were designed with windows directly opposite each other to encourage air flow, 2) in climates warmer than the north east, the kitchen was completely open in the summer - hence the 'dutch' door, where the bottom part keep animals out and small children in.

But as soon as the circular saw allowed us to make fins, shutters became popular in a way that they hadn't been before - they become standard equipment. And then it's not until the 1920's that they become decorative, with little cut-outs on the upper panels.

Why? Are the reasons I've listed enough? I have read that the shutters protected fabric from fading, that a dark interior was fashionable. I am still skeptical, I think these are secondary benefits. The Park-McCullough House has movable interior shutters on all windows, even in the servants' wing. It also has, as original equipment, louvered doors as second doors from the bedrooms in the main house into the upstairs hall (which is a room about 14' wide and 50' long). The House also has a belvedere, (a tower in the center of the house for surveying the beautiful countryside) which even today in the summer easily cools the House. The scientific principal behind it is called a Venturi.

I was recently reminded that mosquitoes do not bite when there is a breeze. I also know that the technology to make windows screens that could protect against mosquitoes was not really available until the 1890's. ( It has to do with weaving fine wire mesh .)

Then I thought about how in the evening the heat of the day could escape out the top of the house, bringing the cool air in from below, and keep the mosquitoes moving. And provide privacy...

I think I've got it!

References:
Victorian Interior Decoration, Winkler and Moss, Henry Holt, NY,1986
How Night Air Became Good Air,1776-1930, Baldwin,
Environmental History, Vol. 8, Issue 3
and conversations with John Crosby Freeman, "The Color Doctor"


Here is the whole series:

Part 1 - http://www.jgrarchitect.com/2008/04/building-to-weather.html

Part 2 - How does the carriage house work with the sun to minimize wind chill?
              http://www.jgrarchitect.com/2008/04/building-to-weather-2.html

Part 3 - Why bother with a cupola?
             http://www.jgrarchitect.com/2008/05/thats-pretty-amazing-cupola-with-all.html

Part 4 - Eaves? they're important?
             http://www.jgrarchitect.com/2008/05/eaves-for-work-and-play.html

Part 5 - How a floor plan makes a difference:
             http://www.jgrarchitect.com/2008/06/no-tech-warmth-with-low-tech-aid.html

Part 6 -  A look at how these concepts were used at the Big House:
             http://www.jgrarchitect.com/2008/09/big-house-is-green-too.html

Part 7 - Shutters:            
             http://www.jgrarchitect.com/2008/03/shutters-ok-i-know-that-they-were-for.ht


Wednesday, June 20, 2012

Building to the weather - Bennington, VT, #1

in this case, PLANTING to the weather
a post for the summer solstice

Here are 2 pictures of the same house. The first was taken in April, the second in June.
Note the absence of shade in April, its presence in June.
The house was build around 1765 in southern Vermont. The trees were planted around the same time.


In the spring, when the warmth of the sun shining through the windows into the house is so welcome, the trees are just beginning to bud. By June, the trees have leafed out shielding the house from the hot sun. They will protect the house though October. Late fall and through winter, the sun will once again be able to warm the house.
Not only do the trees keep the sun off the house, they create a micro-climate. In their shade the air temperature will be about 10* cooler than out in the sun. This temperature change also creates a breeze, always welcome on a hot day.

In lower latitudes, the path of the sun across the sky is different. The east and west elevations are the ones which need trees for shade, while a roof overhang is enough to shade the south facade.

Each climate has its own ways to shelter from the sun. For me one of the pleasures of traveling is watching how a particular part of the world builds, and plants, to its particular climate.

When I wrote- on this blog - about the Park-McCullough House Carriage Barn, I hoped to explain to a modern audience this basic knowledge about climate that our ancestors took for granted. I thought using a building everyone could visit (as it was open to the public) would make the ideas more accessible: you could go look for yourself. I found instead that readers thought only rich people who hired architects built to the weather. 

This time my illustrations are ordinary, vernacular buildings.

Tuesday, July 26, 2022

The Baptist Church of Streetsboro, Ohio, Part 2

The Streetsboro Baptist Church, built c. 1820: the second phase of its construction - its decoration - the front facade and the steeple.


The first post* discussed how the framer used the geometry of the 3/4/5 Triangle to layout the floor, the bents, the walls and  windows, the roof and steeple. After the framers made the building 'tight to the weather',  joiners would often be responsible for the finish work: window sash, doors, molding.  Different trades had different skills and tools.

I think this division of labor happened here.


The church front on a cloudy day in October. It is a handsome building. It is also a box decorated with boards and moldings. That's what I am looking at in this post.

The HABS drawing is below.


The windows had been set by the framer when he laid out the floor plan, the walls, and the roof frame. The black lines show what the front wall would have looked like when the joiner began his work. Holes for windows, a space - perhaps a larger framed opening - for a door, a triangular gable. 


The congregation expected that this box with a roof would become a modern Greek Revival church. 

Of course the joiner was considering the pediment, the frieze, the architrave. the water table. He also needed to lay out a facade which has grace and rhythm as well as symmetry.


Here is the geometry of the facade as the framer knew it: 3 bays with their height from the floor to the roof trusses, their width between the corner posts, and a door, centered but of undetermined dimensions. The windows are centered within the  3/4/5 rectangles of  the frame's rhythm. Their shape is 2- 3/4/5 rectangles.


I think, the joiner chooses to balance the windows first, to set them as supporting wings to the central door. The corner boards grew to become paired columns balanced by 2 more columns on the other side of the windows. Note that the columns are not on the lines of the bays, therefore the center bay is slightly wider than the side bays. The window bays became back drop to the central bay with its  double door and paneled transom.The joiner 'adjusted' the geometry; but the window bays' symmetry is so strong it is hard to catch. The tall, broad main door, recessed  in the main bay, then surrounded by the columns and the frieze, becomes the focus. 

The joiner 'fooled the eye' and created a dynamic facade, much better than 3 equal rectangles would have been.


The framer built the base which supported the steeple. Its dimensions at the roof are based on the 3/4/5 Triangle.


The steeple uses neither the geometry of the frame nor that of the front facade. It is a series of blocks, decreasing in size, with their corners clipped. The design uses the square and the circles that fit within and without it. Was it the work of the same joiner? **


The HABS drawing shows the steeple sections.

Here I have added the circles  - In 'A' the red circle is outside, the green inside. In 'B' that green circle is now outside, a new smaller red circle inside. 'C' continues the progression with the red circle from 'B' now the outside. The green circle of  'C'  is the base of the spire.

 The steeple layout follows the  drawings of James Gibbs in his book "On Architecture", published in England in 1728. Copies were in the Colonies, available to builders.  I have written about Gibbs' steeples here: https://www.jgrarchitect.com/2022/02/james-gibbs-steeples.html  

 These  HABS measurements are too simple for an in depth study of the steeple geometry.


The shapes that make up the tower are a series of blocks with related faces all derived from the simple manipulation of the square: a complete square, 2 squares, one square, half a square (the base for the spire).
The spire's height uses the width of the steeple's base as its unit of measure: it is 1.5 times as tall as the base is wide.
 

The paneling, edge moldings,  and the series of roofs as the tower extends create the steeple.


The  door itself is approximately square, the transom: half a square. They are the same size as the section of the steeple which holds the bell.


The wall of that bay acts as a setting,  a frame for the door.  The columns and architrave are a second frame.


Look again at the photographs.


The church's grace and presence come from simple proportions in the design and the understanding of how light and shadow give life to the parts themselves and thus to the whole building. 

Here is what Asher Benjamin wanted the joiner - and by extension, we who see the church - to understand about moldings :  

"...the bending, or turning inward, of the upper edge of the Grecian, or quirk ovolo, when the sun shines on the surface [and] causes a beautiful variety of light and shade, which greatly relieves it from plane surfaces, and if it is entirely in shadow, but receives a reflected light, the bending or turning inward, at the top, will cause it to contain a greater quality of shade in that place, but softened downward around the moulding to the upper edge."   ***


* Part 1:  https://www.jgrarchitect.com/2018/04/the-baptist-church-of-streetsboro-ohio.html

 
** The Sandown, NH, Meeting House and Gunston Hall in Virginia are good examples of this separation of craft. At Sandown a skilled joiner built the main door and the pulpit, perhaps the wainscotting and box pews. George Mason of Gunston Hall brought William Buckland from England to create the porches and interiors for his new brick house.

**Asher Benjamin, The American Builder's Companion, 6th edition, 1827, R.P. & C. Williams, Dover Publications reprint, Plate IX, Names of Mouldings.


Tuesday, January 10, 2023

Geometry in Construction = Practical Geometry


Geometry in construction = practical geometry.

Does that seem strange, a philosophical stretch?  As recently as the 1930's it was widely understood, commonplace.  Since the 1950's, geometry has been taught as precise, logical, beautiful, magical, amazing.  But practical? Barely. Today the idea is usually met with skepticism.

However, you who read my blog know this is what I study: what those builders know about geometry and how did they use it? 


Euclid's geometry starts with a Point which has no dimensions.  Two points make a Line - 1 dimension3 make a Plane - 2 dimensions.


4 points make an object  - 3 dimensions.  


How can this geometry be practical? 

A Line laid out between 2 points will always be straight. 

A Line drawn by hand might curve; a Line marked by snapping a length of twine cannot curve. This is the beginning: it will be true.  If the geometry is not accurate it will not be practical.

The Line A-B can become a radius. The radius can draw a circle. 

Whether the circle is drawn with a compass set to the length of the radius. or by hand with a length of twine, it will close if the the work is accurate. If the circle does not close upon itself it is not true.        At every step of the layout if the geometry doesn't hold, the designer will know to stop and correct the drawing.


The radius of the circle always divides the circumference of the circle into 6 parts. If the points on the circle, marked by swinging the arc of the radius, are not spaced accurately they will not end exactly where they began. They will not be true. The work cannot proceed. These 6 points on this daisy wheel are not quite accurate.  Note that the daisy petals' shapes are not identical; the points are not equidistant. If I measured the diameters, petal to petal, they would not match. I was not careful enough.        


 The 6 points, joined with lines, can be used in construction.


The rectangles that come from the 6 points can be proved by their diagonals. If they match, the rectangle will have 90* corners and be true. If the diagonals do not match the shape is not a  rectangle. 


A building needs to be stable, whatever materials it is made from, whatever form it takes. For simple vernacular housing the circle was the practical geometry needed to erect a stable, sturdy dwelling.  


The layout tools available to the builder of the Lesser Dabney House* in rural Virginia, c. 1740, were twine, some pegs, a straight edge, some chalk or soot so the twine could mark a line, perhaps a scribe, a compass.

The builder could have laid out this house with the first 4. A peg could have served as a scribe to mark a point. Twine with a loose knot around a peg turns as a compass does.


Here is the floor plan as it was recorded by Henry Glassie, c. 1973: 3 rooms with 2 chimneys and a stair to the attic.  3 windows, 4 doors. The door to the left may have gone into another shed.


The builder stood where he wanted the main wall of the house to be. He pegged the width he chose with twine A-B. That length became his radius. He drew his arcs to find the center of his circle C. Then he drew his circle.  And found it true. The circle's radius steps off 6 times around its circumference. The arc create the 'daisy wheel'.


A-B in the diagram above became 1-2,  the width of the house. The arcs 1-3 and 2-6 of that width crossed at the center of the circle with its 6 points: 1,2,3,4,5,6

The Lines 1-5 and 2-4 laid out the side walls; 6-3 locate the back wall. Diagonals across the rectangular floor plan proved the layout to be true.


The main block is about 20'x17'. The 2 doors  welcomed cooling through breezes in the summer. The wall room on the right may been a later addition to create a parlor, more private and warmer in winter.

Then the builder added the shed. He made his twine the length of the house, folds it in half and then in half again. He then knew what was 1/4 the length of the house (x). He laid out that length (x) 3 times to get the depth of his shed. He stretched his twine diagonally from one corner to the other. If the twine measured 5(x) his shed walls were a 3/4/5 rectangle; the corners 90*, and  true to the main house. The shed roof framed cleanly against the house and was weather tight.

The circle and the 3/4/5 triangle - Practical Geometry -  were the only measuring systems necessary to construct this house.


*The Lesser Dabney House, Fig. 45, Type 3, p, 105; the photograph: p.104. 

Henry Glassie, Folk Housing in Middle Virginia, U Tennessee Press, 1975; plans, drawings and photographs by Henry Glassie.

Henry Glassie recorded floor plans and what history he could find, He photographed. He did not make measured drawings like those in HABS  now in the Library of Congress and available on its website.


Monday, April 28, 2008

Building to the weather - Part 2 of 7: Creating a sun pocket


Here is the main facade of the Park-McCullough House Carriage Barn.

As I wrote in the previous post, it faces east, away from prevailing winds and into the morning sun. Notice that the door - a huge door wide enough for carriages and horses - is set back. This is partly so that the hay door above is easily accessible for hay wagons - they can be parked underneath and unloaded. The recessed space also protects against the wind and gathers the sun, making a pocket of warmth. Gardeners know that sheltered sunny nook where the first daffodils will bloom; this recessed entry creates a sheltered sunny place for horses and people.

Many buildings have a double entry that functions like an air lock: one enters through a set of doors into a little vestibule, closes those doors, then opens another set of doors to enter the main space. It's a way to keep cold air out of a warm space (and vice versa when there is air-conditioning.)


A double entry on a barn is not practical. Imagine how big the airlock would need to be for a carriage with horses! This recessed entry is a pretty good substitute - the doors can be opened without the wind rushing in, and on a sunny day in winter, heat may even come in.


Here is the whole series:

Part 1 - http://www.jgrarchitect.com/2008/04/building-to-weather.html

Part 2 - How does the carriage house work with the sun to minimize wind chill?
              http://www.jgrarchitect.com/2008/04/building-to-weather-2.html

Part 3 - Why bother with a cupola?
             http://www.jgrarchitect.com/2008/05/thats-pretty-amazing-cupola-with-all.html

Part 4 - Eaves? they're important?
             http://www.jgrarchitect.com/2008/05/eaves-for-work-and-play.html

Part 5 - How a floor plan makes a difference:
             http://www.jgrarchitect.com/2008/06/no-tech-warmth-with-low-tech-aid.html

Part 6 -  A look at how these concepts were used at the Big House:
             http://www.jgrarchitect.com/2008/09/big-house-is-green-too.html

Part 7 - Shutters:            
             http://www.jgrarchitect.com/2008/03/shutters-ok-i-know-that-they-were-for.ht

Thursday, April 21, 2022

The Parson Capen House, 1683, Topsfield, MA

This post, first published in 2014, has been revised based on a better understanding of the geometry. 


Parson Joseph Capen built this house in 1683 in Topsfield, Massachusetts.  He ministered to the town from 1682 until his death in 1726.

The story about this house:  It is still here because it was owned by an old Boston family with extensive land holdings.Their herdsmen drove cattle to market in Boston along Rte 1 (which is practically next door to this house) and  used the house as a way station on their trips into the city. So it wasn't torn down, updated, or abandoned. We are lucky.

The pictures are from the LOC HABS archive. Note the drops and brackets. The windows are casements; in the picture they have been swung open.
For more information and photographs in color see  http://www.topsfieldhistory.org/parson_capen.shtml

The geometry for the house is based on the square.  

Here is how a square is derived using a compass, a straightedge and a scribe. 


 Once a carpenter knew his geometry he could layout a square in fewer steps.

The square with its arcs gives the carpenter 4 points - where the arcs cross each other - for dividing his square in half horizontally or vertically. This could have been used for the hall and the second floor beams.     


The chimney and fireplaces were to be in the middle of the house. So the builder laid out the house foundation from the chimney block. The diagram shows in the center the brick which would have formed the back wall of the 4 fireplaces  with 2 square spaces on either side: the parlor and the hall.


Next comes the fireplaces themselves, on both floors, and the flues. On the first floor the main masonry block is a square in plan, the oven needed half a square. Its flue joins the hall chimney.

 On the second floor the chimney mass is square.  


The house has 4 bents, one on each end and one on either side of the chimney mass.  The  fireplaces depths on the second floor determine where the 2 interior bents are placed. It's possible there are bents across the rooms as well. However, since the  summer beams on the first floor appear to be located over windows and the second floor beams do not match the first floor beams, I think not.
The Rule of Thirds was used to lay out the bents. It determined the heights of the floors and the placement of the windows. (The red arrows indicate ceiling heights.)

See this description for how the Rule of Thirds works: https://www.jgrarchitect.com/2020/08/lesson-6-rule-of-thirds-part-1_21.html 

The cantilevered end beams for the second floor have drops below them. The beams for the interior bents have corbels. These are quite visible in the HABS photographs. The cantilevers for the roof also have drops, as well as corbels in the middle of the roof overhangs on the end elevations.


The second floor overhangs the first floor by about a foot on the south/front side. This was popular in England as a way to protect the daub and wattle walls from rain and wind. Here weather boards - known today as clapboards - covered the frame, but the tradition continued. The attic extends out over the second floor on the sides of the house for the same reason.

These HABS photographs are beautiful and clear. Click the images to enlarge them.


The roof pitch  and the placement of the ridge pole might have been laid out from the second floor.  I have seen this proportion - the crossed arcs of the side of the square - in other First Period houses, It may have been  used here.


Note the corbel beside the 2nd floor window which supports the roof overhang.


Here is the front elevation with the drops and corbels noted. They accent the ends of the cantilevered beams which are the top plates of the bents.


The beams:
In the hall the beam which supports the second floor joists was set in the center.
The parlor, the room to the left, is larger. It needed 2 beams. So the space is divided into thirds. These beams are joined to the beam that runs between the 2 bents on this side. The windows were placed where a post would be located under those beams if they were part of bents.

On the second floor  the ceiling beam are centered. All the beams appear to be set to the side of the lines, not on the line.


This drawing may be an accurate depiction of the front elevation. However, the plans are not quite consistent with this layout.  The windows might be set equidistant from the corners of the house, or not.  They may be centered on the second floor rooms, but not on those on the first floor.

Both sets are grouped together in the same geometry. The casement windows are all the same size.


The measured drawings for the Historic American Building Survey, HABS, were done at 1/8"= 1'-0", a scale which is fine for concept, but not good enough for serious consideration of  construction details.  They have very few dimensions. The drawings from 1916 do not quite agree with HABS.
Some observations:
* The Golden Section is not used here. I find that the Golden Section is about growth; houses are about stability.
* The front door is not centered on the facade; if it were the door could not be opened back against the front wall. The brackets sit under the 2nd floor beams extended to support the cantilever.


4/21/22: I wrote much of this 8 years ago. The layout of the foundation based on the location and size of the chimney back still makes sense. I revisited the framing and the elevations, understanding that the layout begins with the framer who must decide where the bents will be; how tall;  where the marks for the mortises and tenons will be. And how will the second floor and roof cantilevers be supported? I explored how a daisy wheel might have determined the layout. The results were messy. The points were not useful markers for building this frame.


Saturday, January 5, 2013

Designing the Old First Church, an introduction

What determined the design of the Old First Church?
What did Lavius Fillmore consider first?

Much was already determined.
Glenn M. Andres in his article, "Architectural elegance: Lavius Fillmore's Refinement of the New England Meeting House", The Walloomsack Review, the journal of the Bennington Museum,  Volume 2, October 2009, says the church committee drew up the plan: The meeting house would be "70 feet by 52 feet with porch, cupola and tower". The framing system was timber post and beam. His partner, Oliver Abel, would be the carpenter and joiner.  The layout was the usual:  1) A two story meeting space - the sanctuary - with a raised pulpit for sermons. Families sat on the main floor. The balconies had sections for young men, young women, servants, people of color, and prisoners, and 2) An entry - the porch - for protection against the weather, for late comers and after meeting mingling.

In the drawing, the porch is under the the steeple, the sanctuary itself to the right. Note the dome over the center.

This church in 1805 felt the congregation itself, the gathered body of those who believed, to be its focus. Church services were held in the morning and continued in the afternoon on Sunday. The minister's sermons could be 2 hours long. The congregation often spoke as well. The acoustics of the space were thus very important.

 Could  Lavius Fillmore create an interior where the minister could preach, the congregation participate, and everyone hear? The traditional solution had been a sounding board - a six ft. diameter solid wood wheel that hung about 4 feet above the preacher to bounce his voice out toward the people in the pews.
Fillmore had been experimenting with acoustics in the churches he built in Connecticut, constructed domes of various shapes to bounce the sound. Here in Bennington he could try again.

Note that the dome is not a semi-sphere. Its cross section is an ellipse. A half circle would bounce the sound from a speaker to only one place, as a mirror does light. An ellipse could send the sound in many different directions. And so it does. Today, 200 years later, someone speaking in the church can be heard by everyone else, whether that speaker is in the pulpit or in a pew.

This dome, its shape, placement, and support seems to me to be to be the place where the design began.

The sanctuary is a wonderful space to hear music. In 1805, singing was mostly a cappella. Instruments were hand held - flute, viola, harp, horn, drum - no organ or piano. Hymn writing and singing was just beginning. I am not sure music would have been considered in the design.

The illustration is "Measured Restored and Drawn by Denison Bingham Hull, Architect". Hull was  the architect who restored the building in 1936.


Monday, July 9, 2012

Building to the weather, Bennington, VT, #2

This picture was taken on July 5th.
The date is important. Here you see how the roof extends, creating eaves that shade the windows of this house from the hot July sun.
In the summer, the sun here in New England is high in the sky. A 16" eave will shade about 5' of the wall below it. Here you can see that the roof over the first floor extend the farthest, casting a longer shadow than the main roof whose shadow covers little more than half the second floor windows. The roof over the sun porch on the right side is also shallow.
Later in the summer, the sun will be lower in the sky. The eaves will not cast as deep a shadow. But the tree will. Its shade will include the front of the house.
In the winter months, when the sun is at a much lower angle, the eaves will not block the welcome sunshine and heat. I will take another picture then and add it to this post.

The porch was probably all screens when it was built - set on the northeast side of the house, held back from the front corner to allow it to be shaded by the house from the sun in the afternoon. These porches have often been glassed in by later owners as they are beautifully sited to be delightful places on sunny late fall and then late winter mornings.

a note on the style: The house is Colonial Revival with a nod toward Cotswold cottages with the deep roof overhangs reminiscent of thatch, the small windows over the entrance, and especially the clipped roof on the gable end, sometimes referred to as a 'jerkin head' after a monk's cowl.