Showing posts with label measuring. Show all posts

Tuesday, November 20, 2018

Lines, in historic and modern construction


 How we build today that can be traced back to the ancient world, 
We may have forgotten how to use geometry, but we still use the concepts and tools.

Lines 
Now called Chalk Lines


Every carpenter knows :1) how to use a Line,  2) why to lay it out,  3) how to pluck the twine at the right angle.


 We learned to snap the Line from someone else, not a book.  This is hands-on teaching - master to apprentice.

We've been educating the next generation this way long before it was written down.
Theo Audel tried in 1923.
Audel's Carpenters and Builders Guide has 2 illustrations showing how to 'pluck' the Line. Other illustrations show how to set the Line with an awl.


Here is his illustration of the Line with its reel and awl.

 He explains that "The line consists of a light string or cord"  made of cotton or linen; that it can come in 20 ft., 50 ft., and 84 ft. hanks, on up to 450 - 600 ft. long lengths. That's a awfully long cord!


In 1923, tape measures were still about 5 years in the future.
We did have 6 ft long folding rules.

This one is mine: it helps me catch nuances in an existing building because I am close to what I need to document.
The tape measure is better for overall dimensions.


That word, 'Line' - the L capitalized - is often used in Practical Geometry. Serlio"s diagram and explanation is the earliest example I have found. The word was understood, not requiring any special explanation. James Gibbs says about his drawings  that they are  "Draughts of useful and convenient Buildings ...which may be executed by any Workman who knows Lines,..."

Today we use Lines for setting a wall in a straight line. The Line is along, or off-set, from where the wall needs to go. We build to it.
Rectangular foundations are 'trued' by checking with a Line that the diagonals match.


How would builder without 20th Century tools use a a Line to lay out a building?

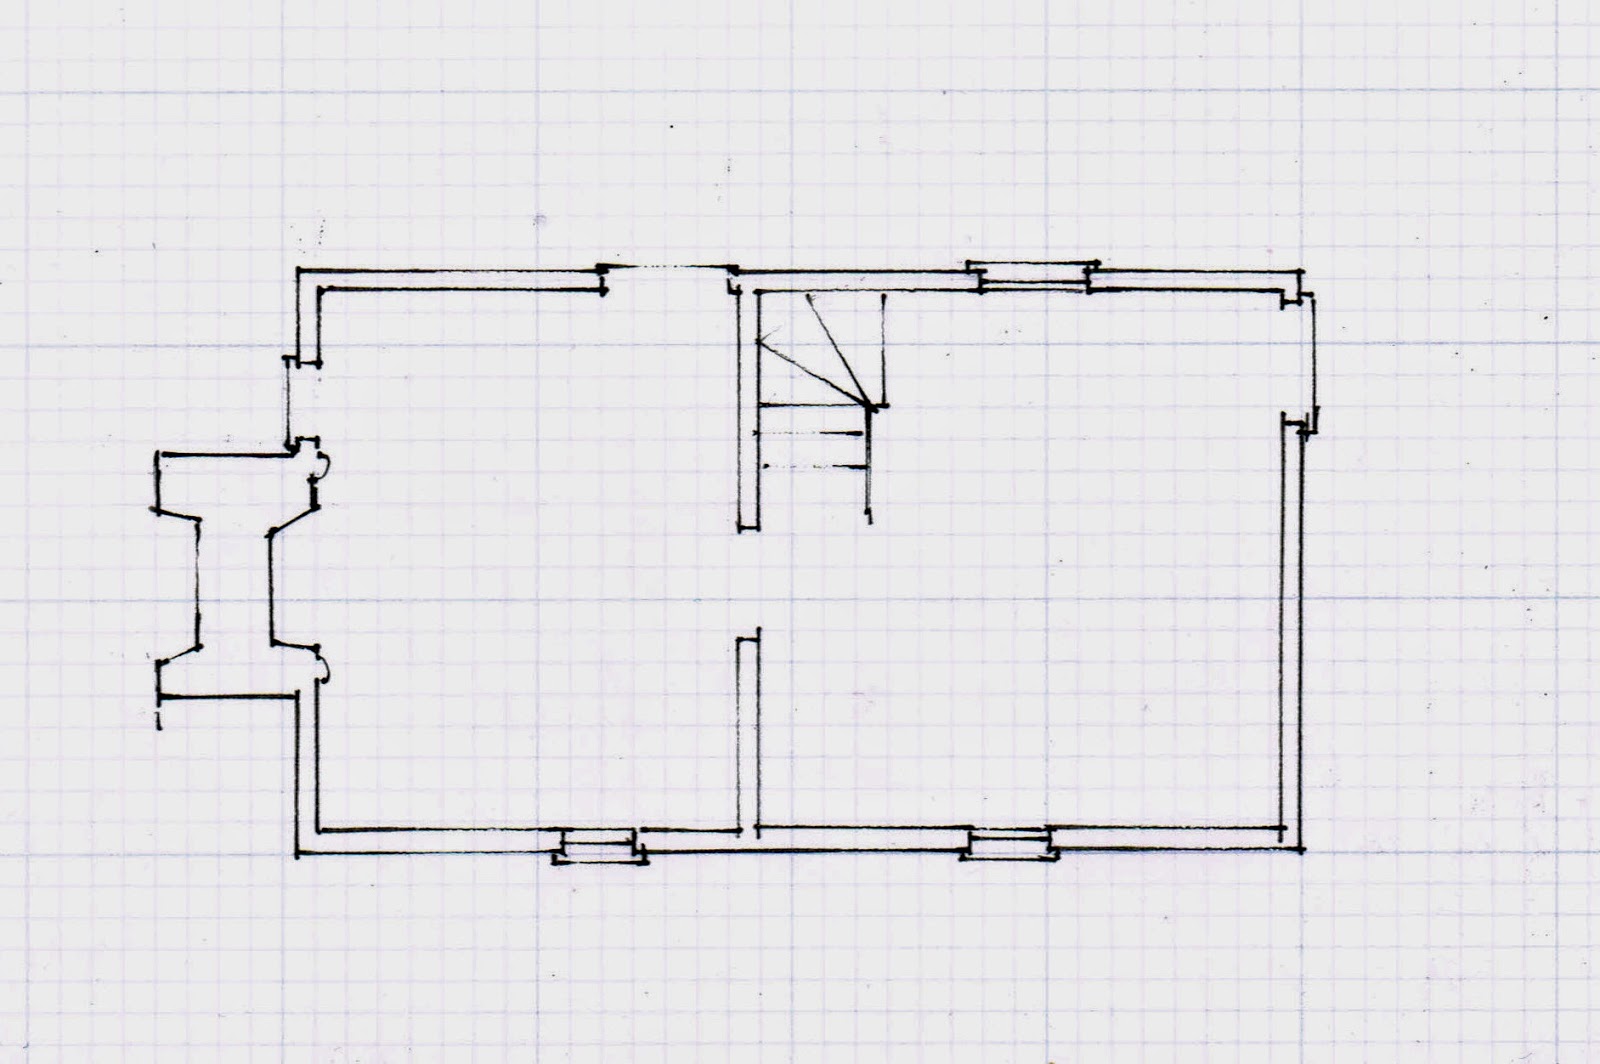
The slave cabin of Tuckahoe is an example.

The carpenter knows how big he will make the cabin and what it will look like: 2 square boxes with roof, lofts, chimney, 2 doors and 2 windows. 

He starts with a Line (C-D) and its Perpendicular (A-B) - basic geometry that he can easily lay out with his cord.  The Lines do not yet have length, just direction.
 He chooses his length  for the width of the cabin: A-B. Probably he has a rod marked off with 5 or 10 units. See the illustration at the end of the post.
He  swings his cord  in an arc using A-B as his radius from C through B to D. Now he has the width and the length of the cabin, and 2 corners.
To find the other 2 corners, he moves to B and swings his arc from E through A to F.
He doesn't yet know where E or F are...
For that  he will stand  at D and swing the cord from A to E. Where the cord intersects with the earlier arc will be the right rear corner, E. F will be determined the same way.
Then he will check that his rectangle is true by running his diagonals F-D and C-E  If they match, he is set. If not he will adjust his Lines.
At no point does he need to use numbers. 
 
The walls of the cabin would be laid out on a framing floor with cord set from point to point, just as timber framers who work by hand do today.


Here's a 14th c. wood cut showing a rod marked in 5 units. It may be longer; it may extend behind his body to end at the rectangle with the triangle at its end - which might be for plumbing a surface.
 C. 1800 pattern books refer to 10' rods. 16.5 ' rods were used to lay out acres.


See my Bibliography for the books of Serlio and Gibbs referred to here.
See also my posts on both men, and my posts on Tuckahoe Plantation.

Audels Carpentry and Builders Guide, a practical illustrated trade assistant, Theo. Audel & Co., NYC, 1923


The subject of the next post:

 How a daisy wheel fits into the use of Lines

This daisy wheel, drawn by a compass, was on the wall of a barn in Vermont. Close examination shows that the center and the tips of the daisy's petals were regularly pricked. The radius and the diameter were regularly used as  dimensions.


Saturday, July 11, 2015

ME: giving a IPTN Workshop, July 22 - 24!


July 22-24, 2015 in the Shelburne Farms Coach Barn, Burlington, Vermont

                                                                             http://www.iptw.org/iptw_2015_home.htm


My workshop is called

"Line, Point, String: Scribe"

I want everyone to draw. So there will be

24 school compasses
2 packs of unlined paper
1 pack of grid paper
a pencil sharpener
some straight edges - not the "thin ivory scale or box rule" recommended by Owen Biddle
erasers - although I want people to explore, not correct mistakes

And of course, photographs and drawings, some posters.

I hope to help people be comfortable with geometry, to be able manipulate the forms,  design their own frames -
and thus create buildings whose parts are proportional to each other. Or maybe just understand how people did once upon a time.

Running  a power point presentation on geometry and construction may be possible.

I hope to be able to schedule a working session for all of us who are exploring geometry.
We have met at other conferences by chance. Maybe this time we can share together what we know.

If you are there too please come find me and introduce yourself.

Friday, July 10, 2015

Geometry of the Cobb-Hepburn House, an aside for skeptics

For previous posts on this house please read
http://www.jgrarchitect.com/2015/02/baring-bones-of-house.html
http://www.jgrarchitect.com/2015/06/the-cobb-hepburn-house-frame-tinmouth-vt.html
http://www.jgrarchitect.com/2015/06/geometry-for-cobb-hepburn-house-part-1.html


Here is the basic geometric shape used for the Cobb-Hepburn House.


When the house was built in 1780, the town of Tinmouth was less than 10 years old. It was the frontier. Paper would have been precious, not generally available for drawing house plans.


The master framer probably used dividers to layout the frame. We can see that he used them to draw the 2'  off set marks on the posts. Look to the bottom right of the post - 2 half circles above a line.

Sheathing was commonly used for diagrams.
I describe one such board found in a barn here:  http://www.jgrarchitect.com/2015/01/a-barn-and-its-daisy-wheel.html

Click the pictures to enlarge them.


25 years later when paper mills had become common, pattern books were popular teaching tools - beginning with basic geometry.


Here is Owen Biddle's Plate I in  Biddle's Young Carpenter's Assistant, 1804:


A and B are illustrations of how to attach paper to a board. C is the T Square.
(E,F,G are diagrams for perpendicular lines and right angles.  J is a 3/4/5 right triangle.K is the circle defined by 3 points not on a straight line.)


Just under the T Square is
H -  the layout of a square using the length of one side.


Biddle describes these engravings as " some of the most useful geometric problems which every carpenter ought to be acquainted with."
He explains that a student should have "a bow-pen or compass". 


 Asher Benjamin's  The American Builder's Companion, 1806, Plate II

has similar diagrams on basic geometry for carpenters.

All figures are explained on the accompanying page.
Fig.  12  is the same diagram as Owen Biddle's  H.

Benjamin writes in his Preface to the Third Edition:
"I have first laid down and explained such problems in Geometry, as are absolutely necessary to the well understanding of the subject."
He begins with

                           Plate I.
                  Practical Geometry.
                       Definitions. 

GEOMETRY, is that Science which treats the descriptions and proportions of magnitudes in general. 


Peter Nicholson's Guide, first published in 1792, in England, begins with geometry. It was updated and reprinted many times in London, New York and Philadelphia.
In his Preface  Asher Benjamin writes that he is "indebted to P. Nicholson's excellent books".

Figure 2 matches Benjamin's Fig.12 and Biddle's H.

This a a print of the actual page, Plate 3 - wear, age spots, and water stains included - in the 10th Edition, 1830.

I have the book in my library - on a long term loan.

.


I  have written this post because of the skepticism I encounter from academics as well as craftsmen.
The use of geometry in construction is often viewed as somehow made up. I suggest doubters read what the master carpenters themselves wrote.


Owen Biddle, Biddle's Young Carpenter's Assistant, originally published 1805, by Benjamin Johnson, Philadephia. Dover (2006) unabridged republication, Dover Publicatons, Inc., Mineola, NY

Asher Benjamin, The American Builder's Companion, first edition published 1806, This print taken from the 6th Edition, 1827; unabridged republication by Dover Publications, Inc., 1969.

Peter Nicholson, The Carpenter's New Guide: Being a Complete Book of Lines for Carpentry and Joinery, Treating Fully on Practical Geometry... 10th edition, John Griggs, Philadelphia, 1830.

Saturday, April 26, 2014

18th c. Virginian folk houses, Part 1

Henry Glassie in his book,  Folk Housing in Middle Virginia, U. of Tennessee, 1975, discussed the 18th c. folk (now usually called vernacular) houses of Louisa and Goochland Counties, Virginia. He recognized that their plans were based on variations of a square and analyzed the ratios he saw.
His illustrations include photographs and measured floor plans.

Because I have only examined buildings in one part of the country, the Northeast, I wanted to look carefully at the vernacular houses he recorded.
From Henry Glassie's drawings could I determine whether or not the house-wrights use geometry? If so what kind? Did settlers in Virginia bring or develop different framing geometries from those in the north?

 Many of these houses had back-to-back fireplaces, one in the main house, one in the adjoining shed. A chimney and fireplace in the 1700's was essential; its cooking fire never went out; it was the source of heat and light. So I include it in my analysis. Here are 3 similar geometries. I have redrawn the plans on graph paper.


Please click the diagrams to enlarge them.

This is The Parrish House, Figure 35,Type 3, in Dr. Glassie's book, mid- 18th century, built of sawn logs dovetailed at the corners.

Its geometry, shown below, begins with  a square, drawn with two solid lines and its diagonals in red. The location of the left window. and the doors are determined by the center. The upper window is located by the half square and its diagonal - a dash-dot red line. The window and door locations are  drawn with a dash-dot green line. 
The rest of the room, including the chimney, comes from half  of the square extended on the right side, dashed red line. That rectangle, divided in half , red dash-dot lines,  and its diagonals, green dash-dot lines, position the right wall and the chimney mass.  I have added green arrows to show those intersections. 
It feels crowded on the drawing, but on site there would have been plenty of space and it is the same geometry each time, just on a smaller scale.

I think the partition wall was a later addition, blocking the stair as it does.  

When I first drew this I thought the size was derived from the Golden Section. I kept looking for a solution based on just a square because the house is static, solid, not fluid. The Golden Section grows; it is dynamic.


This house Dr. Glassie called Unique House. It is House G, Fig. 29 in the book. He notes that it originally had a chimney on both ends.


The red square on the left begins with the chimney. Its right side is the partition wall between the rooms. the right room is a square of the same size. The left outside wall is determined by the square again, just as in the Parrish House above.
If the square starts at the left wall, the right side is at the edge of the stair. See the green square. If the missing chimney is added to the right, the square that would begin on its outer side would also have its left side at the stair. Each side would be the mirror image of the other.
The dot and dash green verticals through the centers of the squares determine the door frame and the center lines of the windows. The right green center-line is canted about a degree, not truly vertical. But the Glassie drawing indicates that the fireplace is also not centered, so I drew it in.  


This is The Moore House, Figure 31, Type 5, House H in Dr. Glassie's book. There is also a front elevation of this house in the book.
The plan shows two main rooms with a shed on each end. A turning stair is located in the back left corner of the larger right hand room.


The main house is composed of 2 squares, drawn in red.  The square to the left includes the chimney. Its green center line locates the center of the windows. The diagonal of half the square crossing one of the 4 small squares within the main one determines the placement of the left wall for the room. See the green dot and dash lines on the left square.
The chimneys on both sides are centered on the squares. But the right chimney is outside the square. Here the smaller square's diagonal and the diagonal of its half rectangle position the chimney base. I've used a green dot and dash line here to mark the intersection as well as the window and door locations for this room.

The sheds on both ends were probably added after the house was built. They are both  laid out as 3-4-5 triangles insuring that they would sit parallel to the existing house. See the dashed and broken black lines on the rooms on either end.

Unlike the buildings in New England and New York, the Virginia houses have only approximate dates and many of them no longer exist.

5/14/2014: I have just returned from driving back roads in Louisa and Goochland Counties, VA, looking at houses that are similar to these recorded by Dr. Glassie. The form is still visible, sometimes as a wing of a larger house, sometimes an out-building on a farm, sometimes in ruins. However, not once did I see a firebox that could have been used outside. This makes me think the houses Dr. Glassie recorded were half of an original house.


Friday, April 18, 2014

Basic geometry - Sandown Meeting House revisited

I have just revised the post I wrote on the Sandown, NH, Meeting House.
 http://www.jgrarchitect.com/2014/02/sandown-new-hampshire-meeting-house-1773.html

I have learned a lot more about early New England geometry since I wrote about Sandown in February. I have been in the Sandown Meeting House, sat in the pews, climbed among the trusses, stood at the lectern in the pulpit. I have visited and explored the geometry of the Parson Capen House, 1683; and the Rockingham, VT, Meeting House, 1785-1800. I am reading Palladio's 4 Books.
I revisited the Sandown measured drawings, found simpler, cleaner geometries which could have been employed.
A new post would have let the old diagrams remain. They are better discarded. I really didn't want anyone to come across the old post through an internet search.  So I redrew and rewrote it.


People had looked at that post 84 times before I revised.
If you are one, please go back and read the new version.


Some of what I learned:

 - How to divide a square into halves; more importantly, why.
Follow the progression on the graph paper here: #1-#2-#3-#4 - counter-clockwise.
I saw how that geometry informed the Parson Capen House.

- What patterns happen when the square in question is divided both horizontally and vertically - see A, B, C, D, E.
- And all the diagonals added.
- And then, imagine 2 squares overlapping! Since this happens at all 3 of the meeting houses I've studied, I needed to think about it more carefully - see F, G.

- And if overlapping is reasonable, how about turning the square 45*, on its point?  See H. The circle surrounding the square is really unnecessary, and, I think, probably not used. Imagine G or H with all its diagonals as in F!
I presented some of that in my diagram for the doors of the Rockingham Meeting House.

Finally I have been trying to understand the influence of Palladio on American vernacular architecture before the 1820's in terms of geometry.
We seem to use squares as a base in New England, and daisy wheel circles in New York. We use 3-4-5 triangles, especially when building an addition. About 1800 the more urban builders seem to begin to explore the Golden Section and less traditional ways to use geometry.

Currently, I do not see builders north of Boston using circles before 1790.
And I will now be skeptical when I see what appears to be a Golden Section. The turned square - H above - uses diagonals just as does the Golden Section. But within the confines of the square, not as an extension.


Sunday, January 19, 2014

The French Andrews House Geometry - Part 2 of 2

The geometry of the floor plan of the French Andrews house focused on the fireplace and chimney mass. Two squares determined the space and the surrounding post and beam frame.  (See Part 1)
Did the framer used the same pattern on the elevations.
He did.
The red squares in the center of the front elevation show this. Starting from the stone foundation, the width of the firebox is also the height to the 2nd floor - the location of the 2nd floor beam. The square above determines the attic floor - the placement of beam at the eaves. The top of the third box is at the height of the ridge pole.
Both sides of the front elevation are squares with one longer side determined by the radius of the circle which fits around the square.  For clarity I have only drawn the square with its diagonals on the west side and I have only drawn the arc in question, 1/4 of the circle.    


 The east and west elevations are identical except that the location of the 1st floor door shown here is the location of a window on the east side.
Again the square is the determining geometry. I could have overlaid my red squares in several different patterns which all worked. I chose this one because it shows how the arc hits the center of the window, the center of the original house, and the edge of the square is also the edge of the door frame.
The north side of the west elevation is a duplicate, reversed, of the one shown. Again I didn't draw it so that the pattern would be easier to read.


 This is a geometry for framing. The squares lay out beam and post locations, not necessarily walls and room sizes.

I wondered how the lean-to was laid out, especially since it was added later and its floor plan used the 3-4-5 triangle, not squares, so that the wing would line up squarely with the existing house.
The lean-to elevation is also laid out with squares, but these begin not from the foundation, but from the first floor - which makes sense  - it was a given.

The roof pitch surprised me because it is so obvious: the diagonal through 2 squares. Given the pattern already established it came naturally and is steep enough when shingled with wood shakes to keep out the rain.

Sometimes when I see these patterns emerge I shake my head and look at myself askance, "Of course! What else would have worked so easily?"

 On the second floor plan are dotted lines indicating the exposed beams overhead. Using my calipers I scaled them and found they made a square. They are not the dimensions of the 'chambers' - they mark the outer edges for the placement of the posts and beams.
Next, drawing the arc based on the length of the square I marked where the arc crosses the diagonal - the Golden Section. All the windows in the south elevation (except the one above the front door, see Part 1) are placed by the Golden Section. The windows are not centered by the Golden Section as they would be a few decades later. Instead the line marks the side of the window. It tells the carpenter where to start to frame the window opening.

Enjoy how the stair hall space within the beams is also a square, although the hall itself is slightly wider as the walls have been placed on the other edge of the beams.

Friday, November 1, 2013

Luykas Van Alen House, 1737, Kinderhook, NY, Part 4 of 4

In January and February, 2012, I wrote about the geometry of the Luykas Van Alen House.
The daisy wheel of circle geometry fit the plan and elevations - mostly. The right hand side didn't work. Or rather, I didn't see a consistent geometry.
To see the earlier posts, search using 'Van Alen'. 

Since then I have toured the house twice.

Once arriving early, I had a private  tour with a knowledgeable docent. After the tour she handed me a 2" thick report on the house and left me happily engaged as she gave the next tour.

The house has been measured at least 2 more times since the HABS  documentation in 1934, and the field notes of Gerald Watland and MC Hopping in 1958. Each time the chimney configuration  on the north end of the house - the right end in the drawings - is slightly different. Recently the exterior chimney visible in the field notes has been removed along with the English fireplace.
The drawing here is from Watland and Hopping's field notes reproduced in John Steven's Dutch Vernacular Architecture in North  America, 1640-1830.
Note that it shows a traditional Dutch fireplace whereas the HABS drawing shows the later, remodeled English fireplace.

 Click on the drawings to enlarge them.

So.
Where might the original wall have been?

I have 2 suggestions. Both are shown on the second drawing.
1) The circle geometry - shown in red - used for the first wing (see Part 1) if rotated 90* could have been used to determine the north foundation wall before the firebox was rebuilt.
2) A 3-4-5 triangle - shown in green - might also have been used. It fits quite well.


The family history says the north wing was added or rebuilt to be living space when the son and his family joined the father. If the foundation was already here, as shed space, then the fireplace and flue would have been added to the existing masonry.
If the wing dates from the arrival of the son, the questions are: How did the builder make it square? How did he fix the proportions when the left wing was already there? To use the same circle geometry he would have had to set the radius. He could have done that by locating the center of the circle from the corners of the existing foundation. The length of that wall is the radius.
Or he could have relied on the 3-4-5 triangle to get his corners square.

Once the foundation is in place the next step is the first floor framing.
Here is the geometry:
Shown in red: The circles based on the interior width of the house determine the wall between the hall and the parlor, the north wall and the location of the floor beam in the hall.  The center lines -'a' and 'c' - locate the wall between the left and right wings and the wall at the parlor. The intersections - 'b' and 'd' - locate the hall floor beam and the edge of the exterior wall.
Shown in green: -The parlor needed closer framing. The space, a 3-4-5 rectangle, is divided in 4 parts which determine the beam locations - 'e' .
.

Finally the window placement:

Here the 3-4-5 triangle determines the size of the space, the location of the windows and door, maybe even the depth of the side walls of the English hearth. That may be later. If so not a valid dimension. Here the red lines show the 3-4-5 triangles, the green: a right triangle (half a square). The dotted black line is the center line through the wing.


Monday, October 21, 2013

C. 1825 workman's cottage, north of Boston

This small house, built about 1825, was one of several built on a country road across from a factory.
Today a park has replaced the factory. The house is in-town. Over the years wings have been added on 3 sides. I have cropped the photograph in order to focus on the original  house.

The post and beam frame includes recycled beams. 2 have beaded edges - probably recycled from the best room of a pre-1760 house.


Here is its section - a slice through the house showing its basic layout.


Here is the 3-4-5 triangle used to determine the size and location of the walls, the pitch (angle) of the roof                       


Here is the 3-4-5 triangle used to locate the 2nd floor joists and the ceiling joists.
The dot and dash triangle determines the height of the collar ties (ceiling joists). Its
vertical leg crosses the first triangle at the location of the second floor. The second floor window locations are also set by this line.
All this also makes me think that the house frame was laid out in the traditional way, on a flat space called a framing yard and then dismantled and re-erected on site. Contractors lay out rafters in this same way today as they frame a roof.  They use the floor of the house just below the roof as their framing yard.


Here is the floor plan. I've noted the chimneys. The lathe and plaster box around the lower one includes modern plumbing, heating and electrical systems.


And here is how the 3-4-5 triangle was used to layout the floor plan. Just as the exterior sills and walls were placed inside the box determined  by the triangle, so the beams on either side of the stair were placed inside the box. The walls, set above the beams, are on the inside edge.

The chimney locations are set by the triangle, but the windows on the opposite wall are not. They are centered on the rooms.


The windows on the side walls are located by a square -  in green - based on the shortest leg of the triangle.

Saturday, February 18, 2012

story poles - Part 1 & 2

Part 1
I think of the world before 1840 as a place where dimensions were not constant, where people didn't expect a foot or an acre to always be the same size. There was machinery, but all hand made. No mass production, no interchangeable parts. (On the other hand, everything could be fixed! No obsolescence!)

So when I think about using geometry to design, layout, and build before 1840 I am thinking about how to transfer information and keep it 'true'.

So here is an hypothesis:
Modern renovation contractors know to "measure 3 times, cut once". The same could be said about the houses built before standard dimensions. So what were the house wrights, masons, and joiners using as the 'measure'? The regulating lines could all be laid out by a length of rope and a piece of charcoal - and a point held tight. But that could be unwieldy: that taunt string got in the way. Or it had to be hung with a weight - not so easy for measuring the height of a unbuilt wall.
Story poles are the answer, I think. A story (or 'storey') pole as currently used is a 2x or a piece of strapping 'marked': the window and door openings noted by a mark, not a number. The length of the pole is the height of whatever is being recorded, a room, an exterior wall, etc. It is set against the place to be laid out and the important points are noted.
Today story poles are used for house framing, for clapboard and brick coursing, for constant dimensions for windows and doors, paneling. That is probably how they have been used for centuries.
Historic restoration carpenters told me they have found story poles in the attics of houses they are working on. That makes sense: What to do with a story pole when the house is finished? Leave it for the next guy!

Part 2
Thinking of this I went to Wikipedia - which did describe 'storey poles' used in the past, and said they were not used today. However, I know about them because I've seen contractors use them.

Considering that my knowledge is concentrated in one particular geographic area and a certain group of contractors, I posed the question of the use of story poles to a contractors' group to which I belong, on-line: "Do you use story poles? If so, how?" 10 contractors, working from the Atlantic seaboard to Kansas, replied that they did. They use story poles for siding, stair layout, shelving, cabinetry, tile work, paneling, windows, chairs, clapboard and brick coursing. In Kentucky they are also called 'preacher boards'.

So, I will add that information to the entry on Wikipedia. The on-line encyclopedia needs a 'source', a footnote that refers to documentation of the idea, to show that it wasn't just one person's opinion. This post, documenting my research and the information provided by the contractors, is that source.
One contractor suggested I check out Lee Valley Precision Story Tapes. With permission from Lee Valley and Veritas Tools I will post them as a source as well.

Note to John Leeke, David M. Lyons, Mark Ratte, as well as the other contractors: Thank you!

Sunday, February 5, 2012

Edward Shaw - uses the tools

This picture of a 1854 construction site had me hoping, even if it was idealized.

The architect - wearing the stove pipe hat - holds dividers as he measures something on the drawing for the observant and expectant carpenters. In the foreground on the grass is a carpenter square, a hammer, and a large compass.

Maybe Edward Shaw's pattern book, The Modern Architect, published in 1854, would mention geometry! Maybe I'd find mention of proportions in a paragraph about something else!

Well, he does say that a main floor window's height should not be more than double its width. Room length, breadth and height and height are mentioned in relationship to each other. But then he states that 10 ft is the desired height... There is great advice for the carpenter and homeowner about foundations, lath and plaster, and 'warming'. Fun, but not what I hoped for.

Shaw's life (1783-1859) spans the change from custom to repetitive parts in construction. The picture shows a building being balloon framed with 2x's , not posts and beams. The drawing in the illustration is being measured and scaled up by dividers, an ancient tool, not a modern architect's scale with regular increments. Almost anyone can draw circles with a compass. In the time Shaw practiced master carpenters and architects knew how to use compasses for design, layout and framing of rectangular buildings.
The book includes extensive explanation of how to lay out columns, scrolls for hand rails, and molding details that would require a hand held compass. The large compass shown would have been for stepping off foundations and wall locations based on the drawing made by the small compass. Or it is possible that the 'compass' is  perhaps a level, folded up.

The picture is the cover of the Dover Publications reprint of Shaw's book. Inside is a reprint of the etching in black and white. It is too dark to reproduce well. For a look at the original print try: http://www.historicnewengland.org/preservation/your-older-or-historic-home/articles/pdf149.pdf . It is part of a good article on a mid-19th century Maine builder in the SPNEA journal, 1967. SPNEA (Society for Preservation of New England Antiquities) is now Historic New England.

Tuesday, January 17, 2012

housekeeping: measuring and regulating lines

I have just added 'regulating lines' and deleted 'research' from the labels on 'measuring'.

Why?
Or perhaps, "So what?"

Because I am trying to write a post on whether the use of circle geometry died when architects took over design from builders, as has been suggested. I don't think so, but as I put together an answer I am asking myself more questions. So my understanding needs to be more thorough. I need to follow up on those directions of inquiry, see where they go and what's there.

I am beginning to think the answer has to do with how master builders, masons, joiners, and architects transferred information to workers. Drawings on paper? A reference cut in a stone ? A diagram on sheathing? Hatch marks meant for assembly on posts and beams?

So my 'research' on measuring turns out to be generic to thinking about the history of regulating lines.

I don't know who is actively following this, but if you are, please read the posts on measuring.

Note: This is when I think being an architect as well as an historian makes the difference. I know a lot about architectural drawings, about what actually goes into providing good information to the people who will be constructing what's in my head. Without that experience I might not even know it could be historically important.

Saturday, March 20, 2010

carpenter squares

In 1815, Silas Hawes in S. Shaftsbury, VT, joined 2 legs of steel together to make a stable, true 90* angle carpenter square. Hawes patented his idea in 1819 and began manufacturing. (Iron squares did exist before this. Illustrations of them can be found in the pyramids and in medieval English carvings. There was one recorded in Plymouth in the 1620's, and another in New Haven, CT, before 1700.)

I became curious about these steel squares when I realized that there were several factories producing steel squares on Paran Creek, which runs from Shaftsbury, through N. Bennington to the Walloomsac River. Lots of factories because of lots of demand - one factory, swept away in a flood in 1852, was immediately rebuilt.

At the same time Asher Benjamin is publishing his pattern books.
And post and beam framing systems are evolving from scribe rule to square rule. This is a change from each tendon fitting only one mortise, to the parts being interchangeable. For example, a brace could fit between the post and beam (sill and stud in the illustration) at the front of a barn or at the back.

Do these facts have anything in common?

A joiner needs to know the angle he uses will be the same each time, dependable, before he can make the same part to be used many places. He needs to own a carpenter square even if it is expensive, and it was - at least a week's pay.

Does the manufacturer of many, many carpenter squares in Vermont a play a role in the evolution away from design using 'regulating lines'?

The Eagle Square sign comes from The Shires of Bennington, published by the Bennington Museum in 1975. The illustrations were drawn by Edwin Tunis for his book, Colonial Craftsmen, the World Publishing Company, 1965.


Tuesday, January 12, 2010

Dividers aka a Compass

This post is undergoing revision to make it clearer - my editor stopped by and gave advice, but I have not yet acted on her suggestions.

I ignored them, much as I ignored those pages of geometry in the pattern books.

But if you use proportions to determine how big something should be, dividers - or a compass - are how you transfer a dimension from one place to another. Dividing your window into 6 parts to find the width of your casing? Use the divider to transfer that dimension from the window to your piece of wood.

Today we would discuss it this way: "6 inches +?" "6 1/4 inches?" "How about only 6 3/8 inches?" Tricky to figure out, right? The divider is easier.

A compass serve a similar function as a ruler or a measuring tape, but it always refer back to a real thing. Intellectually, inches and feet are abstract numbers, with no relationship to any other thing at all. If you ask, "Why use a 5-1/2 inch casing for that window rather than one that's 6-1/2 inches?", an answer might have to do with cost or personal preference. The answer, "Is the 5-1/2 inch casing a better proportion for the window?" doesn't come automatically. When you get to that question using dividers you have already included the window, that's where you began.

I find I am in uncharted territory. At first I thought I was talking about 'calipers'. Then I found the tool I was thinking about is called 'dividers' or 'a compass' .

So far I haven't found very much written that confirms what I am seeing. I do know that proportions and relationships in medieval construction were often based on the circle and how it can be divided and combined. 17th and 18th century woodworking tool box lists include dividers and compasses. However, the drawing comes from Eric Sloan's Museum of Early American Tools , and he places it among the wheelwright's tools, not with the joiners'.


Thursday, December 17, 2009

a reason why those old houses look 'right'

'The Country Builder's Assistant', 1797, is Benjamin's first book. It was written before the factories in Shaftsbury and North Bennington, Vermont, began to mass produce metal squares.

I am thinking about why those squares were so successful (thus my research on measuring) and how they changed how we build. (Did true squares cause square rule framing techniques to develop out of the centuries old scribe rule tradition?)

So as I read this early pattern book, I was thinking about what was normal - what was the expected training of the carpenters who used the book?

Here's a paragraph which accompanies the first plate:
Note: 'Architraves' are now 'casings', the trim that goes around windows and doors, Friezes and Cornices are added above.

"To proportion Architraves to Doors, Windows, &c. divide the width of your Door or Window, into seven or eight parts and give one to the width of the Architrave: Divide that into the same number of parts, as are contained in the Architrave you make use of, if a Frieze or Cornice to the Door, give the Frieze equal to the width of the Architrave; or it may be one fourth or one third wider, the Cornice four fifths or five sixths of the Architrave."

Hmm, no inches and feet, just proportion: the size of the second part determined by the size of the first. Benjamin spells out what he thinks the relationships should be. No dimensions - just 'parts', parts of a whole.

So while I think I'm researching measuring and metal square, I realize I am understanding the reason for something else:
These buildings still feel right because their pieces weren't just added on as today we might 'stick' a windows here or there. Nor was the size of the window decided because someone 'liked' it and thought it 'felt right'. They, actually all the parts, were sized and proportioned to the whole. They belong. And that sense of wholeness resonates with us still.


Tuesday, July 14, 2009

Geometry, Taught in 6 Plates

For years I passed over the plates at the front Asher Benjamin's books. At the time, I only wanted to see his buildings, and had no idea why he included plates on geometry and molding profiles.
Now I study them.

The first 5 plates in The American Builder's Companion are instructions on basic geometry because many of his readers were "untaught." Many young men left apprenticeships to seek their fortunes, move west.They still needed to build. Benjamin provided their geometry course.


He begins:
A point is that which has position, but no magnitude nor dimension; neither length, breadth, nor thickness.

Here is Plate 2, the one we might recognize as useful in design. The Figures 3, 4, and 5 describe how to layout perpendicular lines, Figure 12 scribes a square.

By Plate 4 , Figure 3, he is describing "How to find the raking moldings for a pediment" - a semester of academic learning in 6 pages!

It's not just Asher Benjamin who cares about teaching geometry. Peter Nicholson's The Carpenter's New Guide, which ran 13 editions in Britain and the States from 1792 to 1857, spends 126 pages describing what he calls Practical Geometry. He begins with "1. A Point has position but not magnitude." (He's less flowery than Benjamin).

Neither of these pattern-book authors wanted their ideas to only be copied - they wanted their readers to possess the intellectual tools to adapt these designs to their own situations.

Plate 2 above comes from the Dover Publications 1969 reprint of The American Builder's Companion, 6th Edition, published in 1827,


Wednesday, March 11, 2009

How Long Is Your Cubit?

I've found another reason for Asher Benjamin's geometry lessons and the proportion diagrams on his plates.

It turns out that in 1800, the various and different measuring systems used in the western world were quite divergent. A cubit seems to have been standard measured: from your outstretched middle finger to your elbow (about 18"). But a yard might be from your finger to your nose, (36") or to your near or opposite shoulder, (30", and 42" respectively).

I think this is great, since I have been measuring with body dimensions for years - using my own body to discretely measure an interesting space without drawing attention to myself by whipping out a tape measure, or helping a client to tell me how big is 'big' by stretching out both arms and saying, "This big?"


In 1793, Napoleon tried to create a standard, a metric system, with some success. And in 1824, the English made a standard yard, also with some success. The process took a good 50 years to take hold, and today we still have lots of regional variations, not to speak of the gulf between inches and centimeters.

Here in the States people measured cloth, grain, lumber using the system they had learned in the 'old country'. A Pennsylvania carpenter who repairs 18th century houses has told me he can tell a house built by a German from one built by a Quaker by its dimensioning.

Tuesday, March 3, 2009

Measuring - Proportions


How did carpenters measure in 1797?
What does Asher Benjamin assume his readers know when he writes his first pattern book?

Instructions today for building a simple bookcase  - for example - assumes the carpenter will use  a tape measure and a steel carpenter's square.
By comparison, in 1797, a carpenter had a square and perhaps a folding rule.
 He also had dividers and a compass. He used both to determine dimensions.


 Here are Asher Benjamin's  instructions for the moldings around a door (at the end of the descriptions for Plate 1).  Click the picture  to enlarge it - for easier reading!

He gives no dimensions, just ratios:  'seven or eight parts',  'one fourth or one third wide'.
The reader would have used his compass and dividers to  layout the geometry, to divide a door or window width into  7 or 8 parts.


When Asher Benjamin writes his books, we were still making the parts for a house specifically for that house - no buying off the shelf.
When it came to finish work, each molding added at a door opening or chair rail was made to order, regardless of how it was measured.
Uniform measurements for construction were not necessary until people wanted interchangeable parts. If your yard was 36" and mine was 35" it didn't matter.

Benjamin's introduction to geometry - his first plates - and his descriptions of how to draw the profiles of various moldings show his readers to how adapt his patterns to their specific buildings.

The Country Builder's Assistant, by Asher Benjamin, 1797,  shown above,  is a reprint by Applewood Books, Bedford, Massachusetts, 1992.  The originals, (worn. well used and well loved!) are often available in rare book libraries.

Monday, February 16, 2009

TOOLS

I am curious about the tools carpenters had around 1800. Asher Benjamin wrote for the trade. He was a 'joiner' himself. He knew what his readers were working with. His books will make more sense if I too know what was in those carpenters' tool boxes.
It is not easy to find any information that's not prefaced with, " I think..." The list so far includes hand saws, chisels, hammers, plumb bob, planes, wooden squares, bits and braces.

No rulers, no measuring sticks. This last fact really interests me.

Eric Sloan wrote about early American tools in the 1960's. His books have beautiful pictures, some dates, and basic information. He knew a great deal more than is in the books. I wish he had written more.